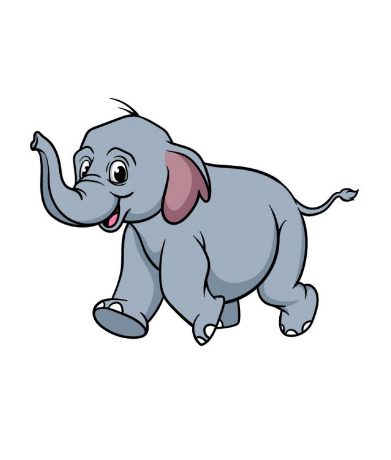
How to Draw A Baby Elephant. One of the laws of nature is that no matter what animal you choose, it will be cute if you find a baby version!
Also, check our cat coloring page.
Even animals that get as nasty as snakes and spiders are pretty cute when they’re babies.
The same goes for babies who grow up like baby elephants. Many people love these giant cuties and like to show them by learning to draw a baby elephant.
How to Draw A Baby Elephant
Step 1
We’ll start with the elephant’s head for the first step of our tutorial on how to draw a baby elephant.
It may seem quite detailed, but if you take it slow and stick closely to the reference image, you shouldn’t have any problems! First, use a rounded line for the top of the elephant’s head.
Then, moving down a bit, you can use two curved lines that will later go on the eyes. Finally, you can draw the outstretched trunk with a smiling mouth underneath. That’s all for this step; now you’re good to go!
Step 2
Elephants are known for many physical traits, and one of those traits is their large floppy ears. That’s why we’ll add this look to your baby elephant drawing now!
To draw these ears, use curved lines so they fall to the side of the head. Next, draw the bottom of the head before you start drawing the chest and front of the legs.
Some small details are also added to the face, as you can see in the reference image. These will help make the baby elephant even cuter! You can complete this step by adding some hair to the elephant’s head.
Step 3
This part of our guide to drawing a baby elephant focuses on refining the eyes and front legs.
The main feature of the face will be the eyes. They will be large and round with large pupils colored black on the inside. These will also help make the baby elephant happy and cute!
Then, when you’re happy with how the face looks, you can refine the lines for the legs as they appear in the reference image.
The picture also shows you how to bend the elephant’s feet to look like he is walking.
Step 4
Your baby elephant drawing looks great! We’ll work on some final details in the next few steps before we start coloring.
First, use a curved line for the elephant’s belly returning from the legs.
Next, use more curved and rounded lines to start the hind legs, which are also positioned so that the elephant appears to be walking.
Step 5
This fifth step of our how-to-draw-a-baby elephant guide is adding some final elements before finishing with some color.

First, you can draw a curved line for the elephant’s back. Then wrap this line until you reach the back legs. You can finish by drawing the rest of the back legs and adding a tail on the back.
This is enough for the final details, but you don’t have to stop there! Before proceeding, you can also add some personal information.
You could draw a background to show where this cute baby elephant is. What kind of environment do you think this girl would be in?
Step 6
You have reached the final stage of your baby elephant drawing, where you will have a lot of fun coloring your amazing picture!

Our reference image used a nice grey for the elephant and some pink for the inner ears. However, this is a suggestion; feel free to use whatever colors you love for this design!
Even if you keep the elephant’s colors more muted and realistic, you can always use some lighter colors elsewhere.
You could add some lighter colors for variety if you drew a background.
Once you know what you want to use to color the image, you can also have fun choosing the artistic tools and media you want to use.
For brighter and more vibrant colors, you could use acrylic paint or colored pencils. You can also go for more muted tones using watercolor and colored pencils to achieve this look.
Your Baby Elephant Drawing Is Finished!

